Monday, March 15, 2021

How to Fix White Screen on Yanhua Digimaster 3


Customer Problem: I used Digimaster 3 for my Lexus, but when I select “Lexus”, there was nothing appeared.

How-to-Fix-White-Screen-on-Yanhua-Digimaster-3-1

Obd2tool.com engineer replied:

Please delete DEVI file, and update again. Here are the related steps below:
In the state of shutdown, at the same time press “1” and keyboard keys, and then boot, after a string of English appear, then loose hand, press OK.

How-to-Fix-White-Screen-on-Yanhua-Digimaster-3-2
How-to-Fix-White-Screen-on-Yanhua-Digimaster-3-3
How-to-Fix-White-Screen-on-Yanhua-Digimaster-3-4
How-to-Fix-White-Screen-on-Yanhua-Digimaster-3-5


Sunday, March 14, 2021

Reset Airbag by Digimaster 3


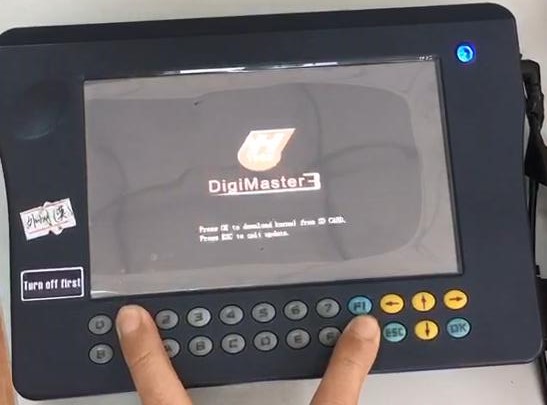
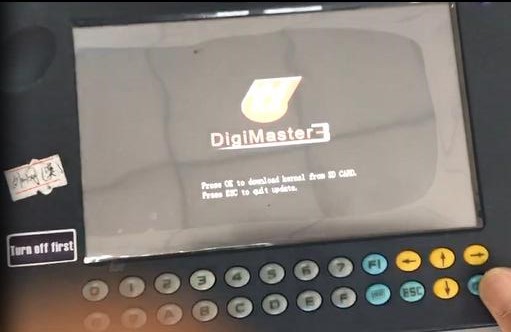
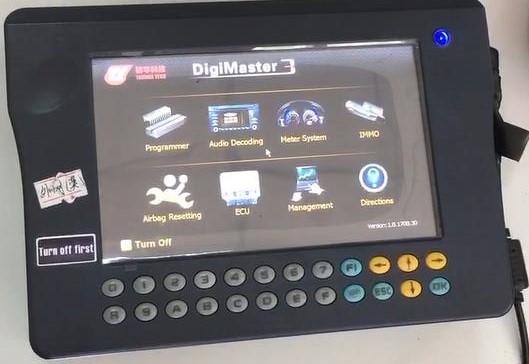
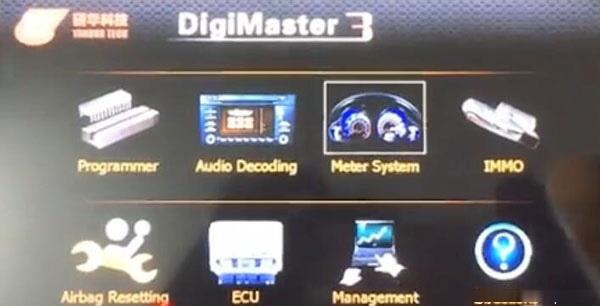
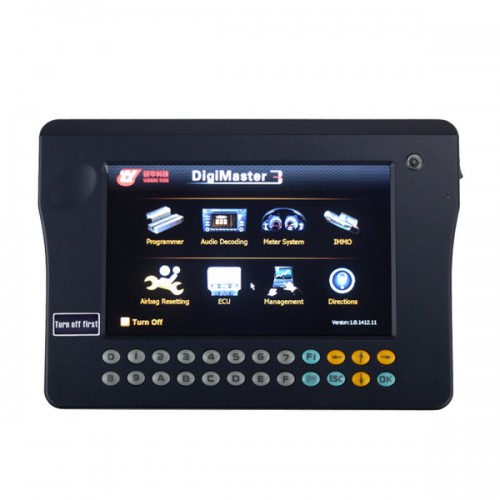
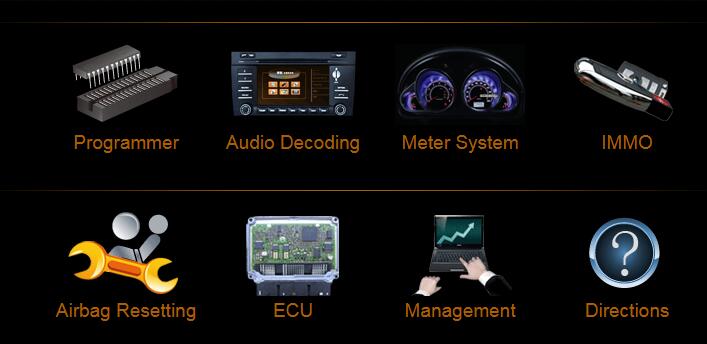
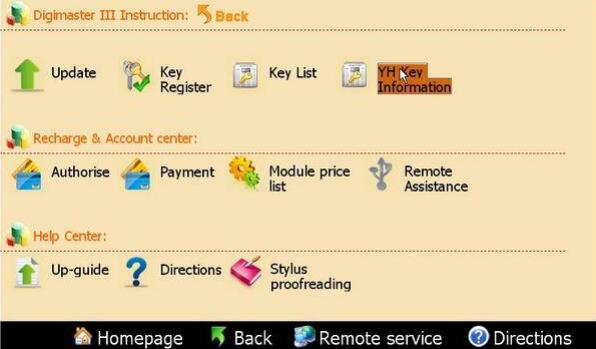
As we know, Yanhua Digimaster 3 can support automotive odometer adjustment, ECU, Airbag ECU data 
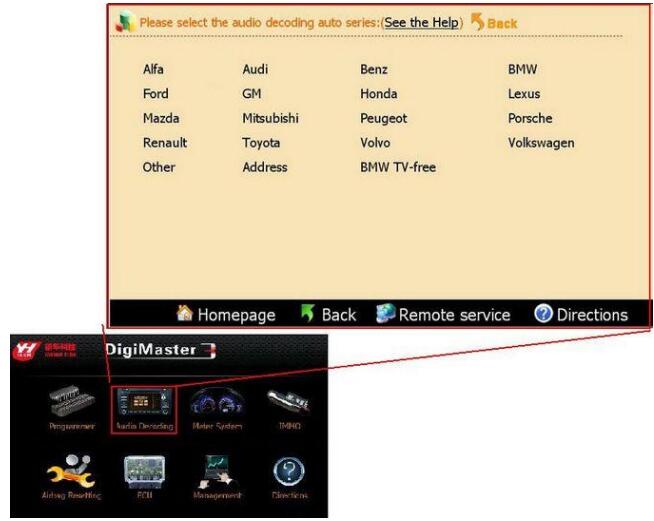
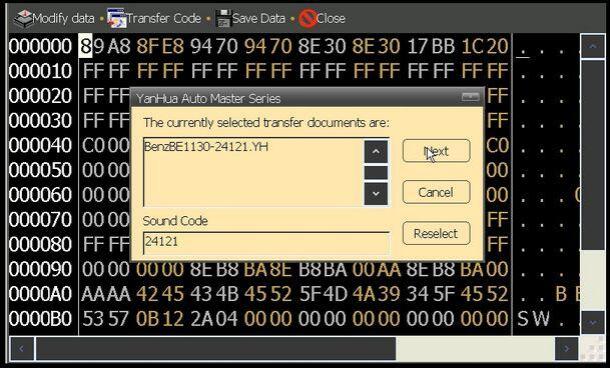
adjustment, computer program matching, audio decoding, automotive memory programming and key programming. Here mainly share the guide to reset Airbag and control computer data.

How-to-reset-Airbag-by-Digimaster-3-1

How to reset Airbag by Digimaster 3?

Note: After airbag detonation,the error record will be saved in the memory code of circuit board by airbag ECU. If you write the data generated before detonation when the computer hard disk not destroy, then you no need to change the circuit board.

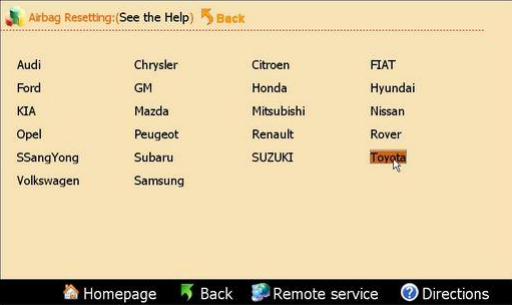
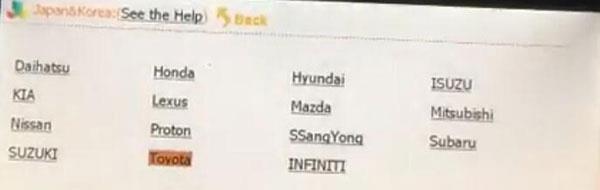
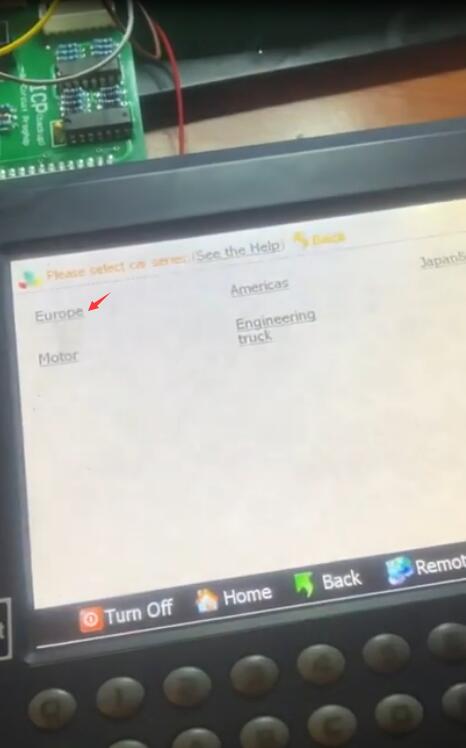
Step1: Enter the Airbag Resetting interface

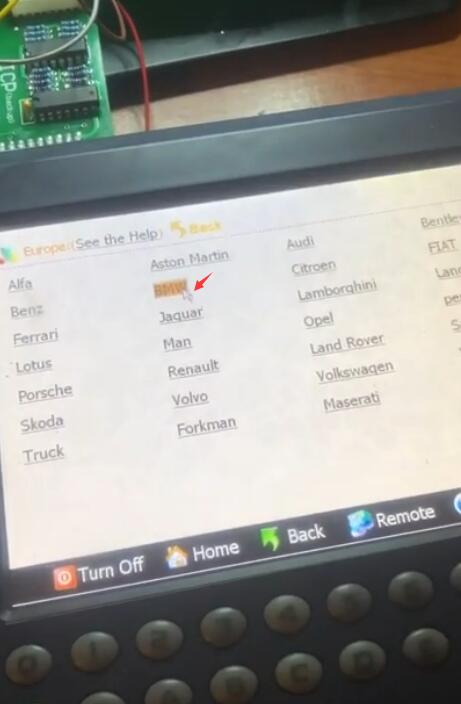
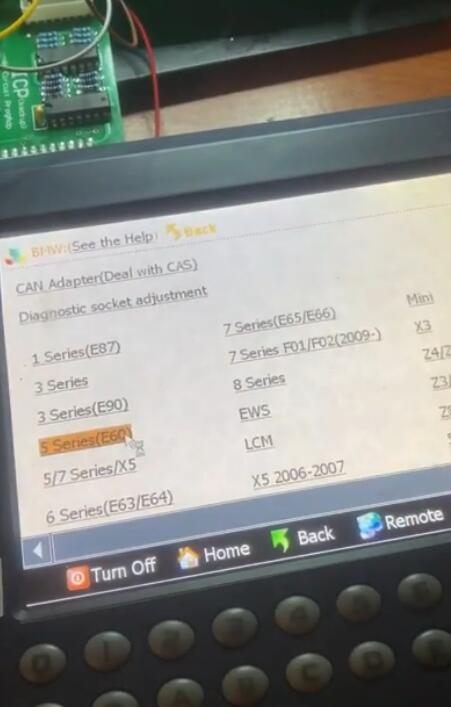
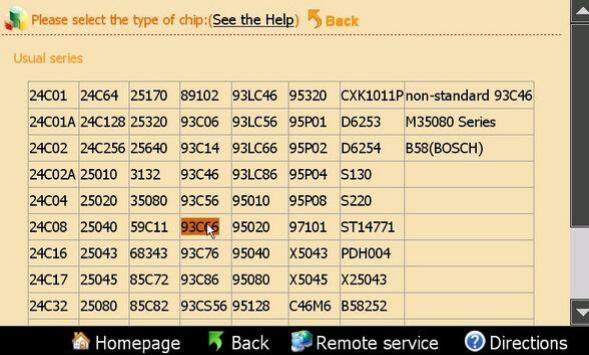
Choose the relevant model

Here we take Toyota as example

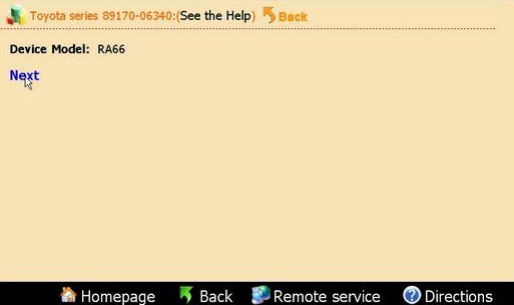
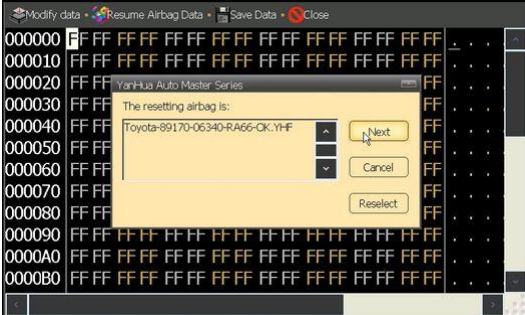
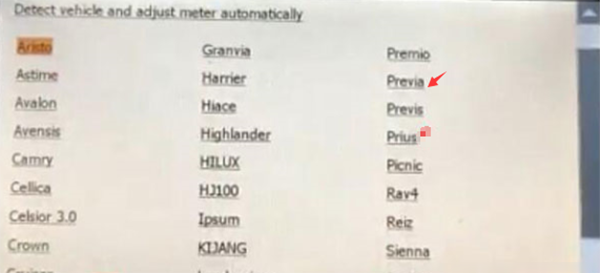
Step2: The airbag will be showed in list by number

Take “Toyota89170-06340” as example

How-to-reset-Airbag-by-Digimaster-3-2

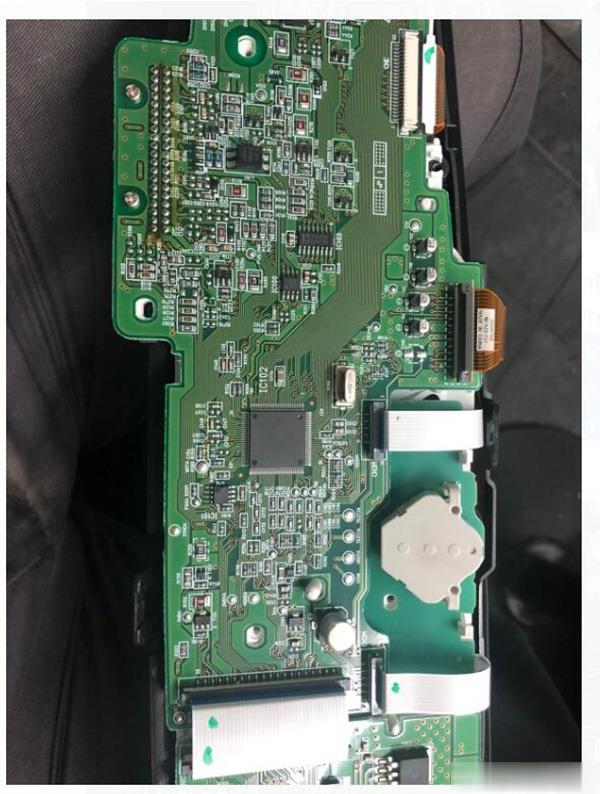
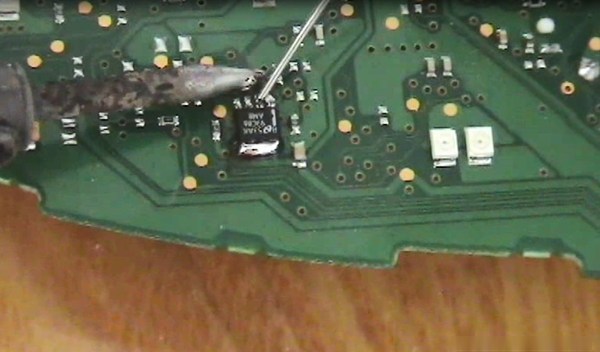
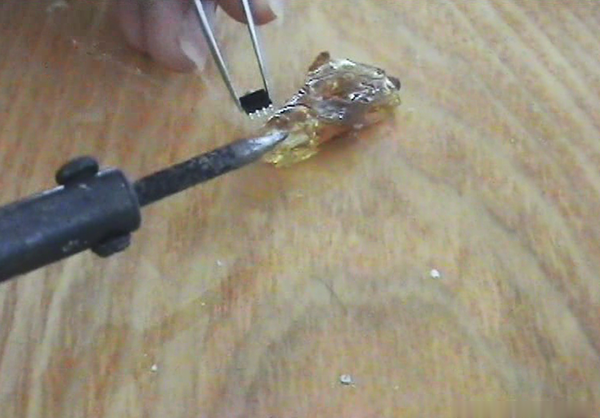
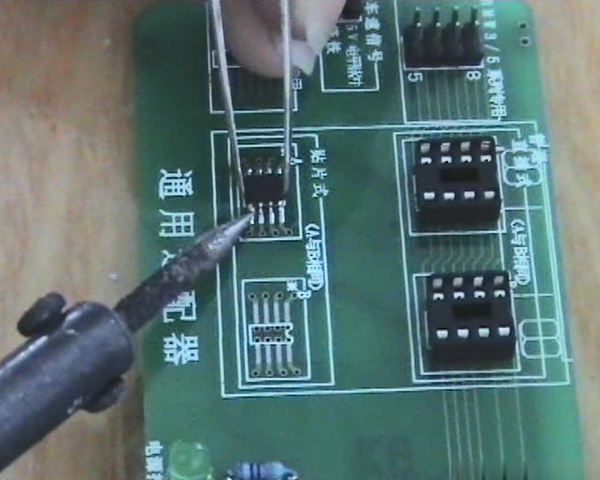
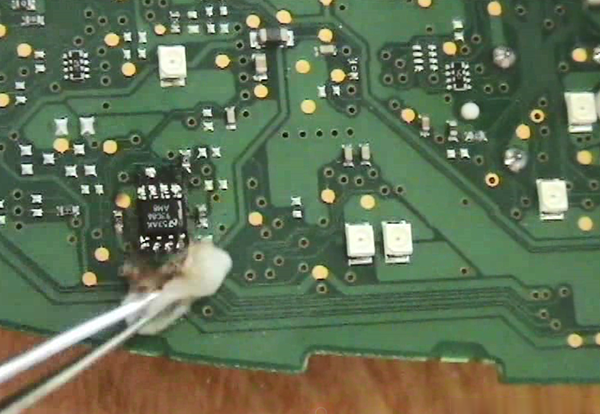
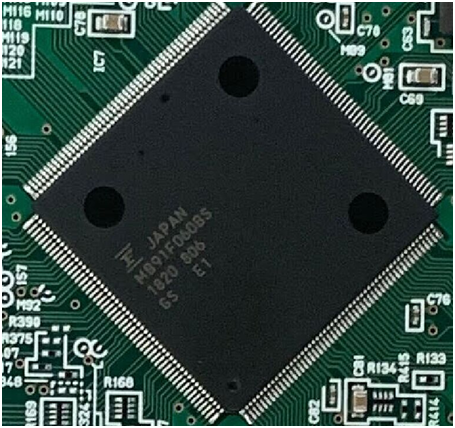
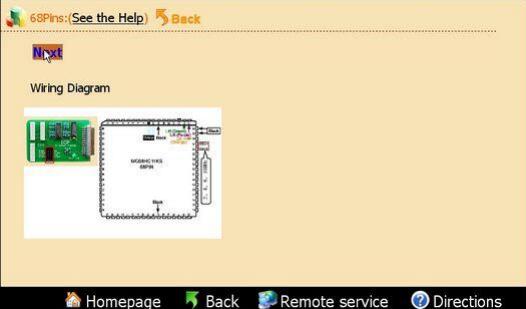
Find out the chip in airbag ECU according to the diagram

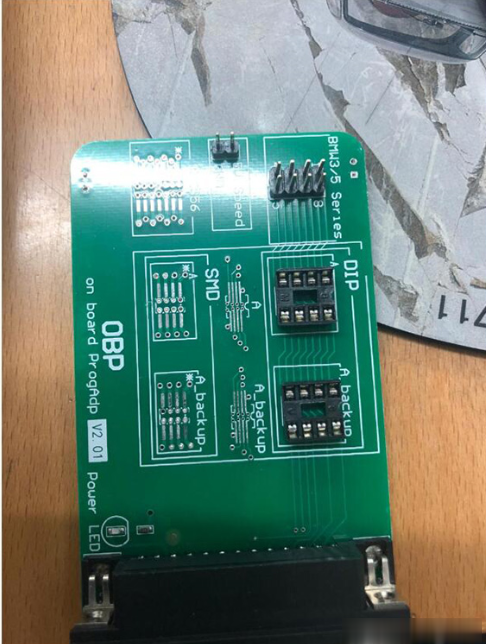
Then dismantle the chip to install to OBP adapter, click “next step”

How-to-reset-Airbag-by-Digimaster-3-3

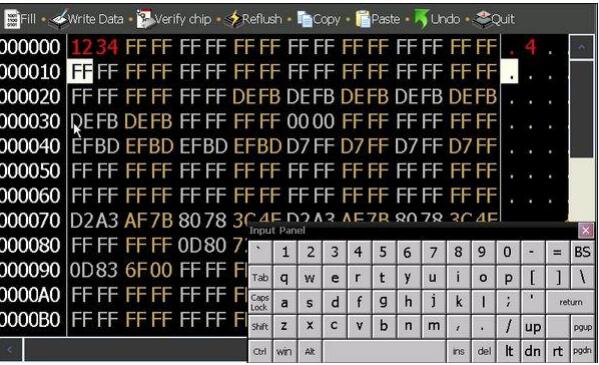
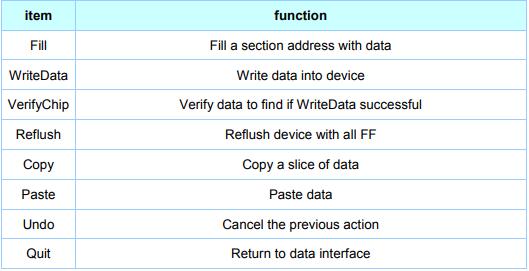
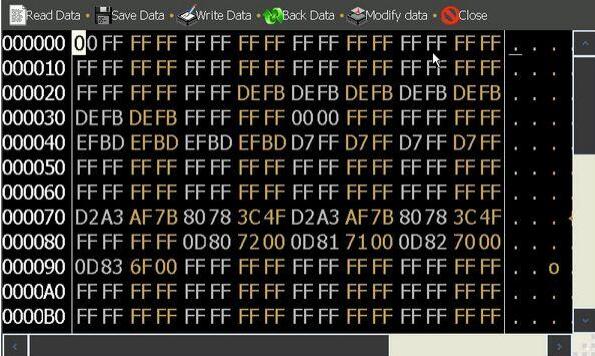
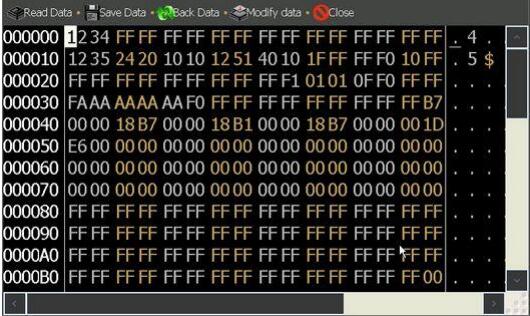
Step3: After finish reading data, it will prompt you whether need to restore airbag

Click “next step”, the data will be restored to airbag chip
How-to-reset-Airbag-by-Digimaster-3-4

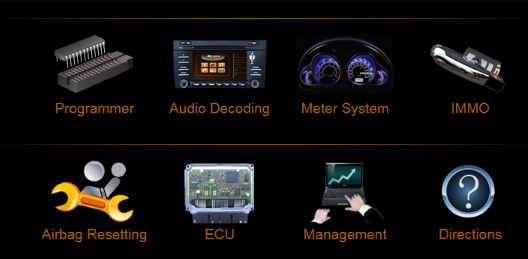
2.How to reset Control Computer data by Digimaster 3?

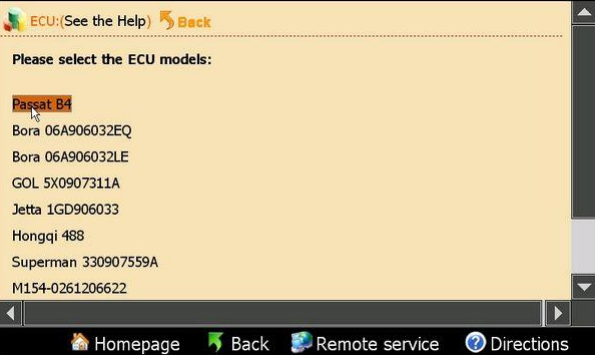
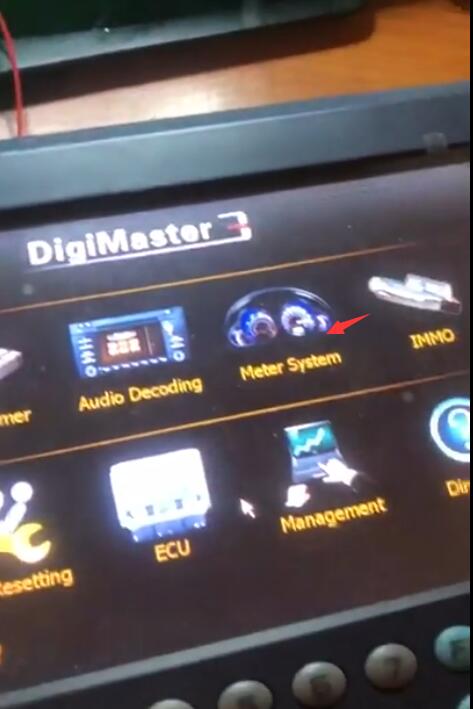
Step 1: Enter “ECU” main menu

Select the corresponding car model

Here take “Passat B4” for example

How-to-reset-Airbag-by-Digimaster-3-5

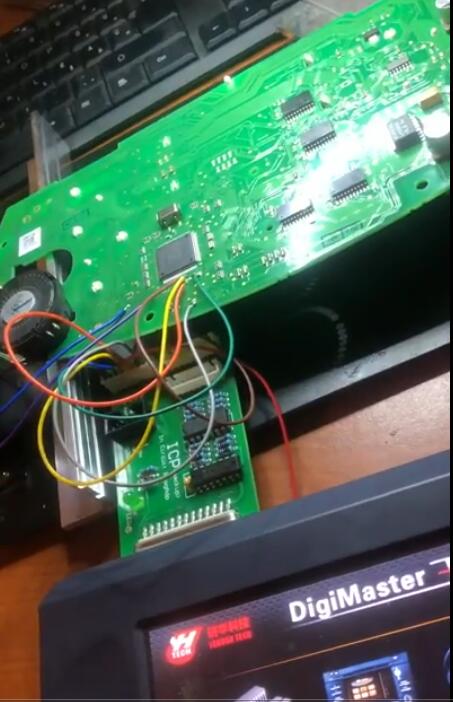
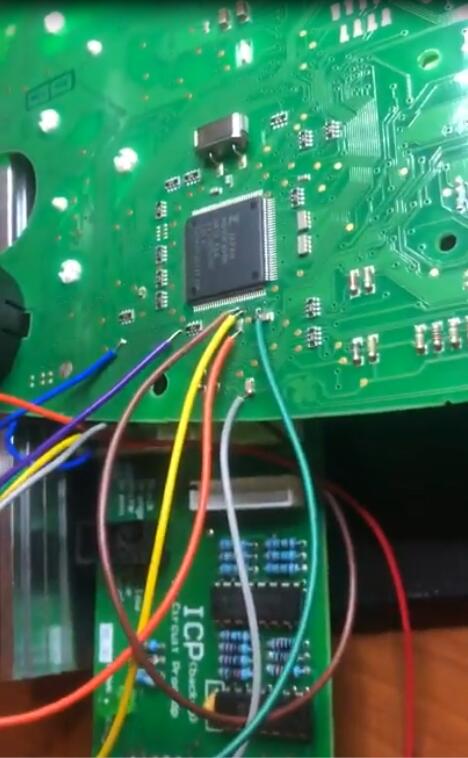
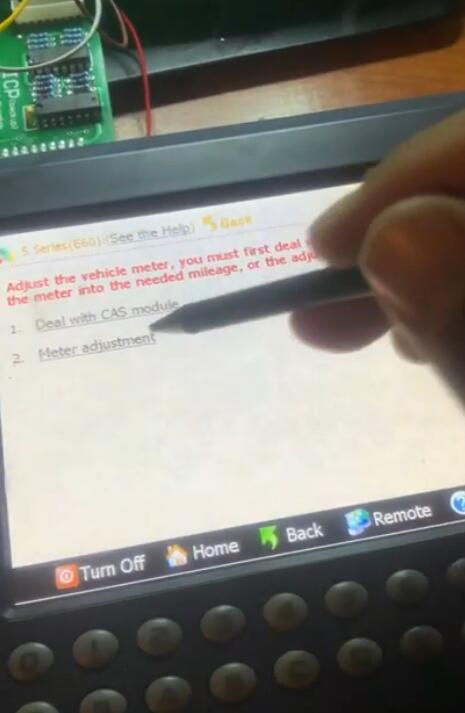
Step2: According to the diagram

Dismantle the chip and install to ICP Adapter

Click “next step” to go on

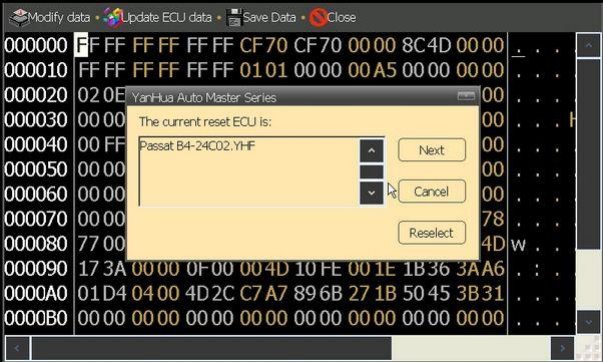
Step3: After finish reading data, it will prompt that “it will cover the engine computer data”

then click “next step” to write data into the engine computer

How-to-reset-Airbag-by-Digimaster-3-6

Step4: After all these operations, just need to put the chip back to car

Digimaster III Odometer Correction Master Airbag Resetting Car Model Full List:

http://forobd2tool.com/wp-content/download/Digimaster_3/digimaster_iii_newest_car_list.pdf

Car models: Audi, Chrysler, Citroen, FIAT, Ford, GM, Honda, Hyundai,KIA, Land Rover, Mazda, Mitsubishi, Nissan, Opel, Peugeot, Renault, SSangYong, Subaru, SUZUKI, Toyota, Volkswagen, Samsung, MG Rover, Cadillac and Luxgen.

Please kindly notice: Here is not full car models Digimaster III supported, the car models always have been updating…

Saturday, March 13, 2021

How to Adjust Mileage for 2012 Toyota Estima by Digimaster 3

Customer problem:

I want to use Digimaster 3 to test toyota Estima Japan model year 2012. I need instructions to adjust the mileage and change the kmh led on dash to read mph. I check the chip is ra57. So which adapter card should I use?

How-to-Adjust-Mileage-for-2012-Toyota-Estima-by-Digimaster-3-1 (2)

Solution offered from Obd2tool.com:

Ra57 means chip 8 feet 93C56, so you need to weld the chip on the OBP board.

How-to-Adjust-Mileage-for-2012-Toyota-Estima-by-Digimaster-3-2 (2)

Follow the guide below to operate:

1.Remove the dashboard shell

2.Unsolder the chip from dashboard

How-to-Adjust-Mileage-for-2012-Toyota-Estima-by-Digimaster-3-3 (2)

3.Remove the excess tin from the chip

How-to-Adjust-Mileage-for-2012-Toyota-Estima-by-Digimaster-3-4 (2)

4.Solder the chip on the 93CS56 position on the OBP adapter

How-to-Adjust-Mileage-for-2012-Toyota-Estima-by-Digimaster-3-5 (2)

5.Connect OBP adapter and digimaster 3 host

6.Enter Digimaster 3 main menu

Select Meter System-> Japan& Korea-> Toyota-> Previa (Estima)-> 93C56 option

How-to-Adjust-Mileage-for-2012-Toyota-Estima-by-Digimaster-3-6 (2)
How-to-Adjust-Mileage-for-2012-Toyota-Estima-by-Digimaster-3-7 (2)
How-to-Adjust-Mileage-for-2012-Toyota-Estima-by-Digimaster-3-8 (2)
How-to-Adjust-Mileage-for-2012-Toyota-Estima-by-Digimaster-3-9 (2)

Then follow the prompt on the screen to read km and change mileage

7.After finish mileage adjustment, unsolder the chip from the adapter, and weld back to dashboard

8.Use the banana oil to clean chip on the dashboard

How-to-Adjust-Mileage-for-2012-Toyota-Estima-by-Digimaster-3-10 (2)


Friday, March 12, 2021

Digimaster 3 change mileage on 2005 Toyota Corolla


We received a problem from our customer when he wanted to use Yanhua Digimaster 3 to adjust mileage for his 2005 Toyota Corolla. Here share the relevant solution with you. Hope helps you.

Digimaster-3-change-mileage-on-2005-Toyota-Corolla

Problem:

I don’t know how to use. I tried to adjust odometer on Toyota Corolla. First ask me device module 2 keep says can’t find the device. Can you tell me how to do it simply?

Solution:

Open Odometer Correction Tool Digimaster 3 home page

Select “Meter System”-> “Asia”-> “Toyota”

Choose the corolla 2005 vehicle model and enter next step

The system will prompt what chip is.

Find the car chip and check whether it is consistent with the prompt or not

If it is, disassemble it and weld to OBP adapter

Connect with digimaster 3 to read data

And follow the prompt to change mileage

Done!

Thursday, March 11, 2021

Yanhua Digimaster 3 Review Correct odometer on BMW E60 35080 successfully


With various types of adapter, the Original Yanhua Digimaster 3 is easy to use for odometer correction, audio decoding, airbag resetting, engine ECU resetting, IMMO and programming key for Benz& BMW, etc. Here I’d like to share my experience to change mileage on my BMW E60 35080 with Digimaster 3.

Cost& Package:

I purchased digimaster 3 at yanhuaacdp e-shop. It cost me 905 usd. I received them after 5 days.

All the goods packed in a big box and kept well, nothing is missing. I am so satisfied.

The test:

I tried to use this device to change my BMW E60 mileage. Get the details below!

Connect OBD2 Odometer Correction Tool Digimaster 3 to the E60 dashboard

Yanhua-Digimaster-3-Correct-odometer-on-BMW-E60-35080-successfully-1
Yanhua-Digimaster-3-Correct-odometer-on-BMW-E60-35080-successfully-2

Open Digimaster 3 home page

Select “Meter System”-> “Europe”-> “BMW”-> “Series (E60)” -> “Meter adjustment” -> “350850”

Yanhua-Digimaster-3-Correct-odometer-on-BMW-E60-35080-successfully-3
Yanhua-Digimaster-3-Correct-odometer-on-BMW-E60-35080-successfully-4
Yanhua-Digimaster-3-Correct-odometer-on-BMW-E60-35080-successfully-5
Yanhua-Digimaster-3-Correct-odometer-on-BMW-E60-35080-successfully-6
Yanhua-Digimaster-3-Correct-odometer-on-BMW-E60-35080-successfully-7
Yanhua-Digimaster-3-Correct-odometer-on-BMW-E60-35080-successfully-8

Pay attention to the wiring diagram and the adjustment mileage must more than 32KM

Click “Next”

Yanhua-Digimaster-3-Correct-odometer-on-BMW-E60-35080-successfully-9

Prompt “Current Kilometer: 278144 KM, Confirm to adjust?”

Click “Yes” to next step

Yanhua-Digimaster-3-Correct-odometer-on-BMW-E60-35080-successfully-10

Save the BMW 35080 mileage data before adjust

Yanhua-Digimaster-3-Correct-odometer-on-BMW-E60-35080-successfully-11

Adjust the mileage to 330350 KM

Click “OK”

Yanhua-Digimaster-3-Correct-odometer-on-BMW-E60-35080-successfully-12

Write data succeed

Click “Read mileage” at the top left

Prompt “Current kilometer: 330336 kilometer”

Click “OK”

Yanhua-Digimaster-3-Correct-odometer-on-BMW-E60-35080-successfully-14

Correct odometer successfully!

Hope it helps you!

Wednesday, March 10, 2021

Can digimaster 3 adjust mileage for 2016-2018 kia picanto ion

Here have collected some odometer correction problems from Yanhua Digimaster 3 customers. Check the relevant answers below

Q1: Can digimaster 3 adjust mileage for 2016-2018 kia picanto ion?

Does it need tokens? When I want to update module ID 063f, the system prompts need 50 tokens.

A1: This function was upgraded in September 2018.If the digimaster 3 purchased before this date, it needs tokens. On the contrary, no need tokens. There are 200 tokens in the device for later upgrades.

Q2: I bought Digimaster3 to change mileage on 2014 Toyota 4 Runner, but I didn’t find the car model, how to do?

A2: Open dashboard to find an eight feet chip

Follow the corresponding model to read original car km by digimaster 3

Then change mileage you want

Can-digimaster-3-adjust-mileage-for-2016-2018-kia-picanto-ion-1
Can-digimaster-3-adjust-mileage-for-2016-2018-kia-picanto-ion-2

Q3: Can I use YH digimaster 3 to change mileage on Ford Transit 2015 Mk7?

A3: Yes, need to dismantle the dashboard.

Q4: Does digimaster 3 support 2018 Toyota Rav4 odometer correction? Attach the CPU diagram as below.

Can-digimaster-3-adjust-mileage-for-2016-2018-kia-picanto-ion-3

A4: In general, the chip on the dashboard is 8 feet or the CPU is for the beginning of MB9, both are supported.

Of course, you can change mileage by this Yanhua device.

Hope it’s helpful!

Tuesday, March 9, 2021

Digimaster III reset control computer data for VW Passat B4


How to reset the control computer data on VW PASSAT B4 by Digimaster 3 odometer correction master? Check the step-by-step guide below.

Step 1: Open Digimster III main menu

Select “ECU”-> “Passat B4”

Digimaster-III-reset-control-computer-data-for-VW-Passat-B4-1
Digimaster-III-reset-control-computer-data-for-VW-Passat-B4-2

Step 2: According to the diagram, dismantle the chip and install to ICP Adapter, click “next step” to go on

Step 3: After finish reading data, it will prompt that “it will cover the engine computer data”, then click “next step” to write data into the engine computer

Digimaster-III-reset-control-computer-data-for-VW-Passat-B4-3

Step4: After all these operations, put the chip back to car.

Done!

Monday, March 8, 2021

How to register and read key on Digimaster 3


This article is available with the guide to register and read key on Yanhua Digimaster 3.

How to register Digimaster 3 key?

Step 1: Go to Digimaster 3 main menu

Select “Management”-> “Digimaster III Instruction” -> “Key Register”

Download and update your YH key List

How-to-register-and-read-key-on-Digimaster-3-1

Input the verify code and click “Next step”

How-to-register-and-read-key-on-Digimaster-3-2

Follow the prompt to complete all the operation

How to read key list?

Step 1: Click “Key List” to read the key ID bound to your device

How-to-register-and-read-key-on-Digimaster-3-3

Step 2: Follow the prompt to update before reading key list

Note: If you have done software update in recent days, please click “No” to skip this step

How-to-register-and-read-key-on-Digimaster-3-4
How-to-register-and-read-key-on-Digimaster-3-5

How to read YH key information?

Step 1: Click “YH Key Information”

How-to-register-and-read-key-on-Digimaster-3-6

Step 2: Insert the key to adapter as figure and click “Next”, a dialog box will pop up to show you the key info

How-to-register-and-read-key-on-Digimaster-3-7
How-to-register-and-read-key-on-Digimaster-3-8


Sunday, March 7, 2021

How to program IC/CPU and decode audio on Digimaster 3


Yanhua Digimaster 3 works with various types of adapter you can easily achieve odometer correction, Audio decoding, airbag resetting, engine ECU resetting, IMMO, programming key for Benz & BMW etc. Here share the instructions including:

Files Operation

– IC Programming

– CPU Programming

– Signal Generator

Audio Decoding

-Audio Code Management

-Address Code

In detail…

Files Operation:

In this function, you will see IC programming, CPU programming, Odometer adjusting, Audio decoding. It shows the current data read from the IC by HEX format. You can adjust or save the data in this interface.

HEX address is in the left column. Data area is in the right column. Data ASCII display is in the bottom when you move the scroll bar.

How-to-program-ICCPU-and-decode-audio-on-Digimaster-3-1
How-to-program-ICCPU-and-decode-audio-on-Digimaster-3-2
How-to-program-ICCPU-and-decode-audio-on-Digimaster-3-3
How-to-program-ICCPU-and-decode-audio-on-Digimaster-3-4

IC Programming

Step 1: Connect the chip De-solder or link the chip to the OBP adapter according to the instruction

How-to-program-ICCPU-and-decode-audio-on-Digimaster-3-5

Step 2: Choose the corresponding chip in this interface to begin read or program the chip

How-to-program-ICCPU-and-decode-audio-on-Digimaster-3-6

CPU Programming

Step 1: Connect the chip De-solder or link the chip to the OBP adapter according to the instruction

How-to-program-ICCPU-and-decode-audio-on-Digimaster-3-7

Step 2: Choose the corresponding chip in this interface to begin read or program the chip
How-to-program-ICCPU-and-decode-audio-on-Digimaster-3-8

Signal Generator

Frequency signal generator can generate the specified speed signal, connect to the signal pin in the odometer and then used to run the odometer

Audio Decoding:

When the vehicle audio was power off because of buttery damage, the audio will start the anti-theft system automatically. Digimaster III can calculate the audio code out or initialize it.

How-to-program-ICCPU-and-decode-audio-on-Digimaster-3-9

Audio Code Management

Step 1: De-solder the corresponding chip according to the software prompts. Click “Next” to begin decoding

How-to-program-ICCPU-and-decode-audio-on-Digimaster-3-10

Step 2: Please remember the code in the pop-up dialogue box, click”Next”, the code was written in the chip

How-to-program-ICCPU-and-decode-audio-on-Digimaster-3-11

Step 3: Solder the chip back to the board, and then use this new code to decode the audio.

Address Code

These models only need to short-circuit some welding spot to reset the code, the software will give a specific method.

Enjoy!